Guideline for do it yourself homeowners who are planning to perform standard kitchen cabinets installation by self.
Tools require:
- Chalk line
- Tape measure
- Pencil
- Utility knife
- Stud finder
- Pry bar
- Level
- Hammer
- Drill
- Hole saw
- 23 gauge finish nail gun
- Air compressor
- Miter saw
- Table saw
- Vacuum
- Step ladder
- Safety glasses, mask, gloves
Also you might need additional materials including
- couple 2x4s for making shims or additional support for countertop
- screws
- wood adhesive
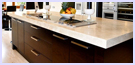
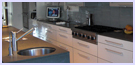
Design kitchen layout
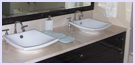
According to kitchen dimensions draw a plan which sizes of stock cabinets have to be installed including standard openings for dishwasher, stove, microwave and refrigerator. Also decide which kitchen sink will be practical for your needs and plan the cabinet dimensions according to the size of sink.
Preparation
Complete rough-in plumbing and electrical prior to cabinets installation. Fix walls, apply primer and first coat of paint. Find and mark wall studs. Check the floor level. From the highest point measure 54” in height and make a horizontal leveled line on the wall which will indicate the bottom of wall cabinets.
Install wall cabinets
Hang corner cabinet – put at least two screws from the top through the cabinet into wall stud and two from the bottom. Other cabinets install according the plan. Put screws in every stud from the top and from the bottom of each wall cabinet. Screw cabinets together – at least in the three points if the cabinets 30” – 36” high and four points if 42” high. All holes for screws have to be predrilled and heads hidden.
Base cabinets installation
From the highest point of the floor measure 34 1/2” in height and make a horizontal leveled line on the wall which should be absolutely parallel to the bottom line of wall cabinets. Start installation from the corner base cabinet. All other cabinets install according to plan. One screw from the top in every stud will be sufficient to secure base cabinets. Use shims for lifting certain cabinets if the floor is not flat or leveled. Same as wall screw all base cabinets together.
Toe kick and moldings installation
After all cabinets are in place install toe kick using liquid nails wood adhesive and securing it with 23 gauge finish nail gun. Install all desire moldings and trims.
Install switches and outlets inside cabinets
Install kitchen cabinets hardware
Door knobs and handles installation is the last step of a whole installation process. The best way to drill all holes for hardware evenly is to make a jig template from 1/4” plywood with holes according to handles dimensions. Than just place the template along door edge and drill the hole with adequate diameter of a drill bit.
Tips
Standard openings for:
- under countertop dishwasher – 24” wide
- stove – 30” in width
- over-the-range microwave – 30”
- refrigerator – 36”
Prior to installing any cabinet cut all holes from the back of kitchen cabinet for electrical outlets, switches, drain and water pipes.
Use fillers for extending the overall width of kitchen cabinets and fitting exact into kitchen dimension.
Studs can be found using stud finder, but always remember distance between wall studs in most residential houses 16 inches.
Kitchen cabinets installation is a type of a project which requires two people. While some pros might be able to manage the installation of stock cabinets alone, it is much more convenient and faster to work with a helper.